High Altitude Weather Balloon
About The Project
"Watchful Eagle" began as a high school project between me and a couple other students to see whether we could deploy and recover a payload of sensors and video cameras attached to a weather balloon. Funding for this project was sourced through the generous contributions of our 45 backers on Kickstarter, who ultimately allowed us to raise $970 towards funding the supplies that went into making this whole thing possible.
We had a couple goals in mind when we entered this project:
- Deploy a collection of sensors into the stratosphere and recover the payload safely
- Capture a continuous video and timelapse of the whole journey
- Relay back a live video feed from the payload that could be viewed during ascent
All-in-all, fundraising began at the end of 2015, development took place between 2015 and 2016, and the final balloon made its ascent during the summer of 2017 after an available launch window was chosen.

Fundraising goals listed on our Kickstarter campaign
Design And Components
The following materials went into making this project possible:
- Weather balloon (2000 grams) + Helium tank
- Parachute
- Raspberry Pi 3 B+ computer + breakout "wedge" board
- Ravpower 26800mAh power bank
- SPOT satellite tracking device
- Various sensors interfacing with the Raspberry Pi
- Long distance analog video transmitter + receiver
Telemetry Electronics
We developed a custom electronic board and supporting software to record telemetry for this project. The board ended up being a simple collection of sensors mounted to a breakout board, which interfaced with a Raspberry Pi computer via an I2C bus (barometers + accelerometer + compass) and serial connection (GPS).
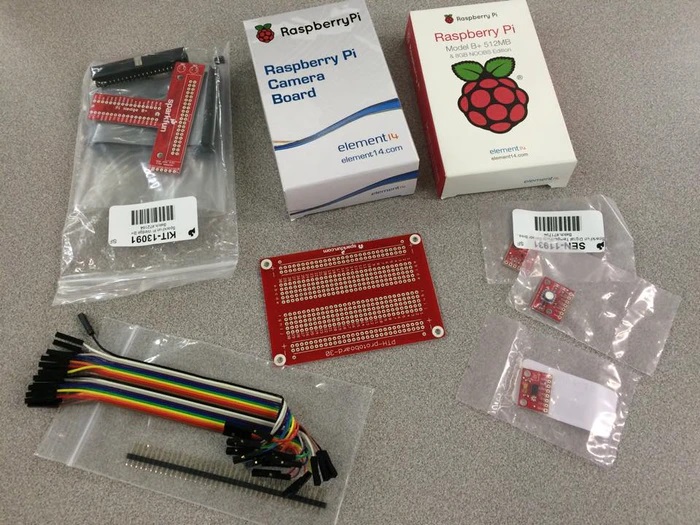
Partial collection of parts, mostly sourced from SparkFun and Adafruit
The assembled computer and sensors module were installed in a styrofoam box, along with the video transmitter and battery bank. Due to the very cold conditions outside, it was critical that this box was insulated. The heat generated by the transmitter and Raspberry Pi served as a crude way of keeping these internals warm — particularly the battery bank, which drops in capacity at lower temperatures.
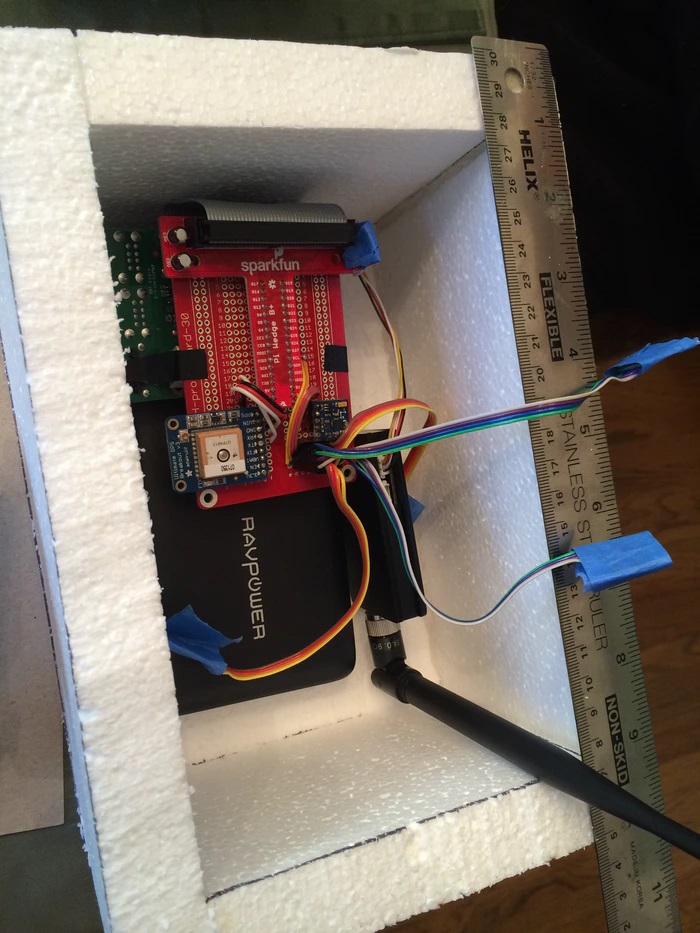
Electronics installed in the payload box
Around the outside of the final payload box, we installed two knockoff GoPros to capture both video and timelapse of the balloon's flight. Both of these cameras were charged by a separate power bank installed on top of the telemetry box, and mounted on a 45 degree angle to capture a good shot of the earth below.
Live Video + Telemetry System
Video and telemetry was transmitted from the weather balloon over a 1.5W analog video transmitter, operating at 910Mhz. The Raspberry Pi's display output was used as a video source, and an application was run on the Raspberry Pi which displayed telemetry data and one of our Ham radio call signs alongside the video feed from the Raspberry Pi camera module.
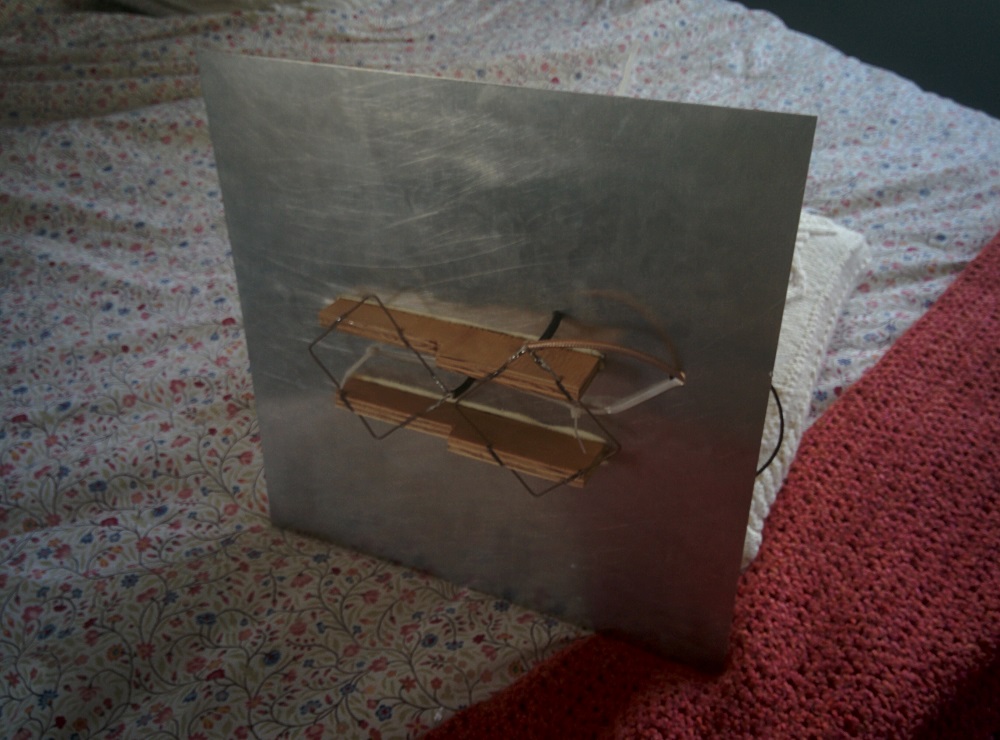
Antenna attached to the payload
We ended up developing three custom directional antennas to relay back video streamed from the balloon. Two of the antennas were mounted on top of chase cars, and one was attached to the bottom of the balloon. We ended up reaching out to a local group of Ham radio enthusiasts, who helped us tune these antennas to the frequency used to transmit the analog video stream.
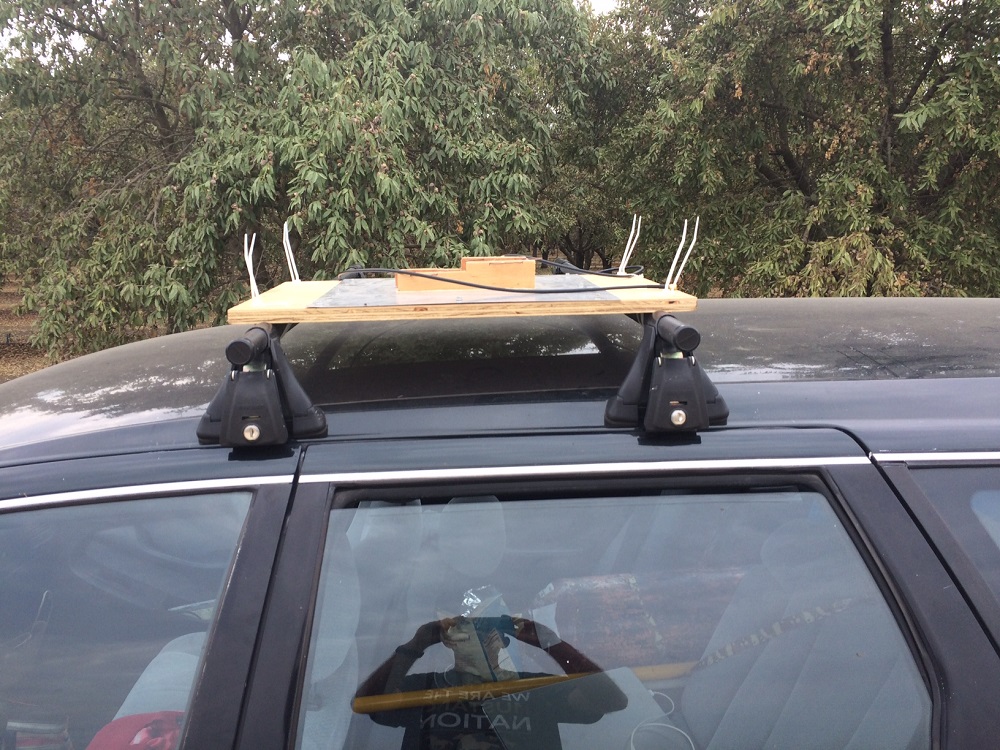
A receiver antenna mounted on top of a chase car
In both cars, a RCA-to-USB conversion device was used to process the video received and forward it to Open Broadcaster Software Studio, which published the stream on Youtube for our donors to watch.
Software
Software for the telemetry and video system were primarily written in C++, with a simple web interface for displaying telemetry alongside the video feed. Sensor data was fetched at a rate of 200Hz, and both stored on the SD card and displayed on the web interface for relaying back to the ground receiver. Since I was most familiar with FIRST Robotics programming at the time, I opted to use many of the developer tools used by my school's robotics team in this project.
Code used for this project is publicly available here
Sensor Receiver
Data from the accelerometer, compass, barometer, and temperature sensors was fetched in a simple loop that polled for new values over the I2C bus. This data was then written to a shared message queue, which allowed other processes to access this data without much overhead. Since the GPS messages arrived at a much slower rate over a separate serial interface, another process handled fetching the current location and writing this location to another shared message queue.
Logger
Data from the accelerometer, compass, barometer, and temperature sensors was fetched in a simple loop that polled for new values over the I2C bus. This data was then written to a shared message queue, which allowed other processes to access this data without much overhead. Since the GPS messages arrived at a much slower rate over a separate serial interface, another process handled fetching the current location and writing this location to another shared message queue.
Web Interface
Sensor data was also consumed by an HTTP server, which serialized the information in a custom format and sent it to a HTML frontend. A Javascript routine handled polling this data and translating it into an HTML table, where it could be viewed alongside the video stream sourced from the Raspberry Pi camera module.
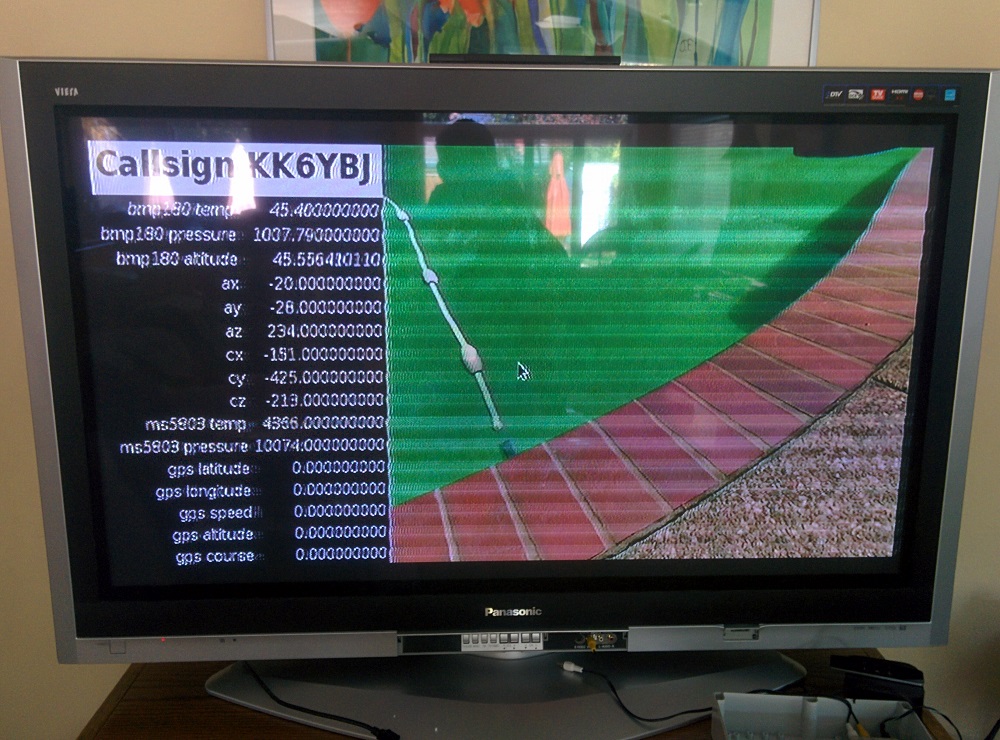
Demo of the web interface streamed over the radio
Launch Day
September 4th, 2017 was chosen as our launch day based off weather forecasts at the time and approximate flight paths generated by an online weather balloon prediction tool. Ultimately, there was a large delay between the start of the project and launch day due to group members graduating and moving away for college.
We ended up launching far away from our hometown of Mountain View, California to mitigate the chances of running into airspace used by the airports in the area — namely, SFO, SJC, and Moffett Field. We instead drove to a small town in Fresno County called Kerman, which was about 150 miles away from our hometown. This area seemed best fit since it was well clear of any active airspace, and was surrounded entirely by rural farms where our balloon could safely land. Additionally, the highway system ran parallel with the expected flight path of the balloon, which gave us a better chance of receiving the video transmission.
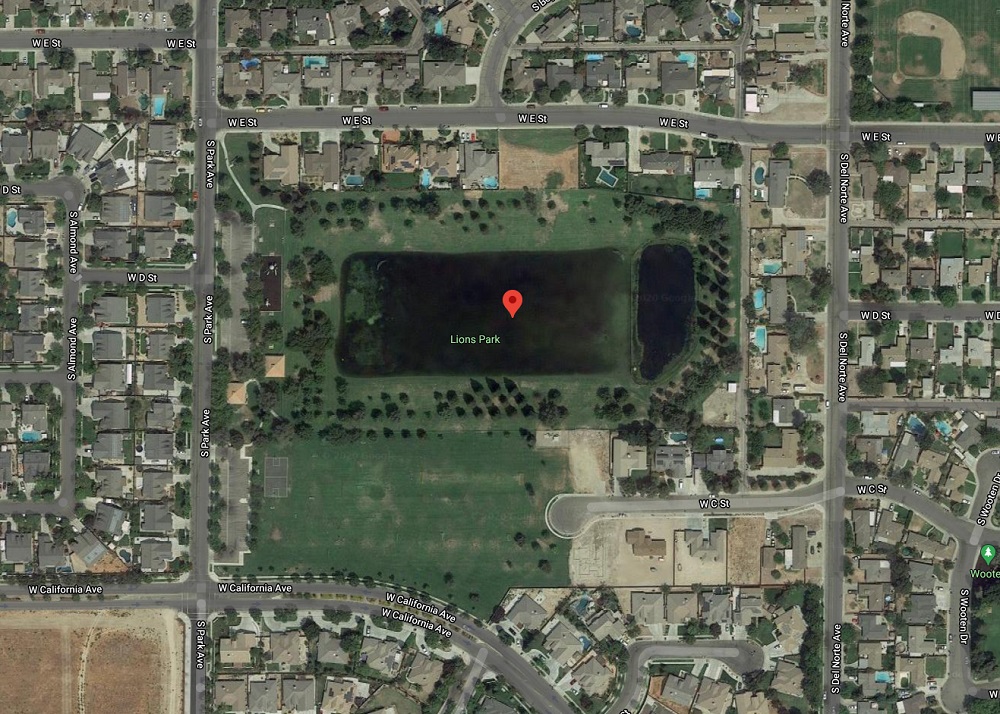
Our launch site at Lion's Park in Kerman, California (from Google Maps)
Setup at the field involved performing a list of pre-flight checks to verify that everything was up and running. We turned on all cameras, telemetry sensors, and transmitters in the payload to verify that everything was communicating as-needed. Since the battery was quite large, we were able to leave this whole system running for about an hour before actually launching the balloon to allow time for any issues to be addressed.
Turning on all system components in the payload
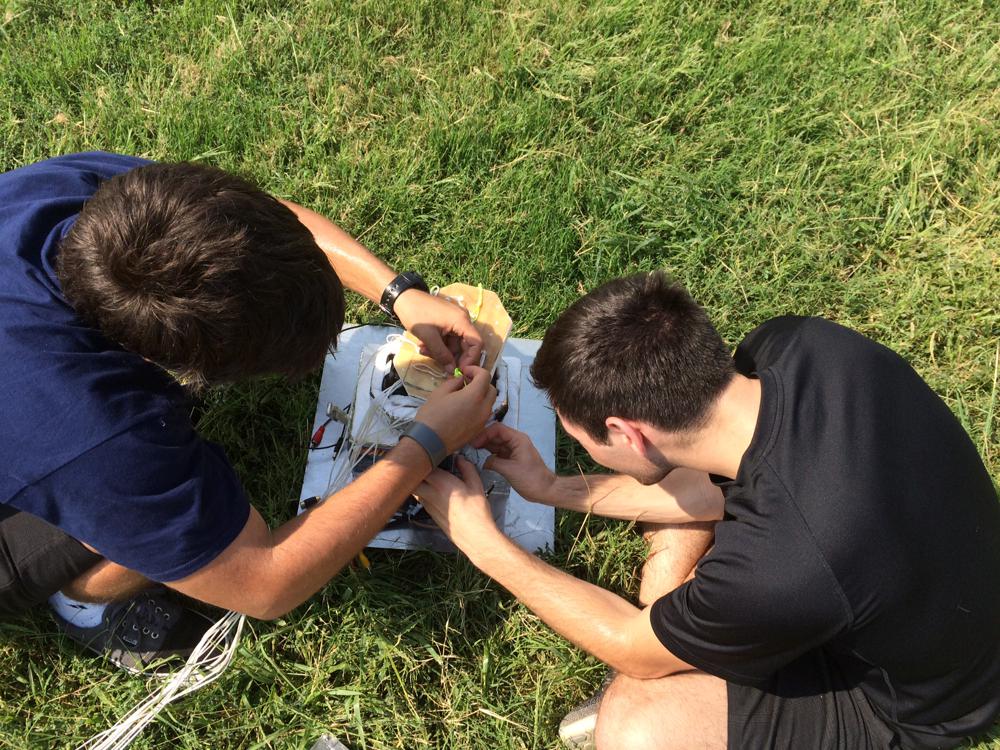
Next, we began filling up the balloon. To prevent oils from our hands getting on the balloon (which would lead to a weaker balloon, and consequently lower burst altitude), everyone around the balloon wore gloves during this process. Additionally, we brought along a tarp to prevent the balloon from touching the grass (which would also weaken the latex and cause the balloon to pop sooner as it expanded).
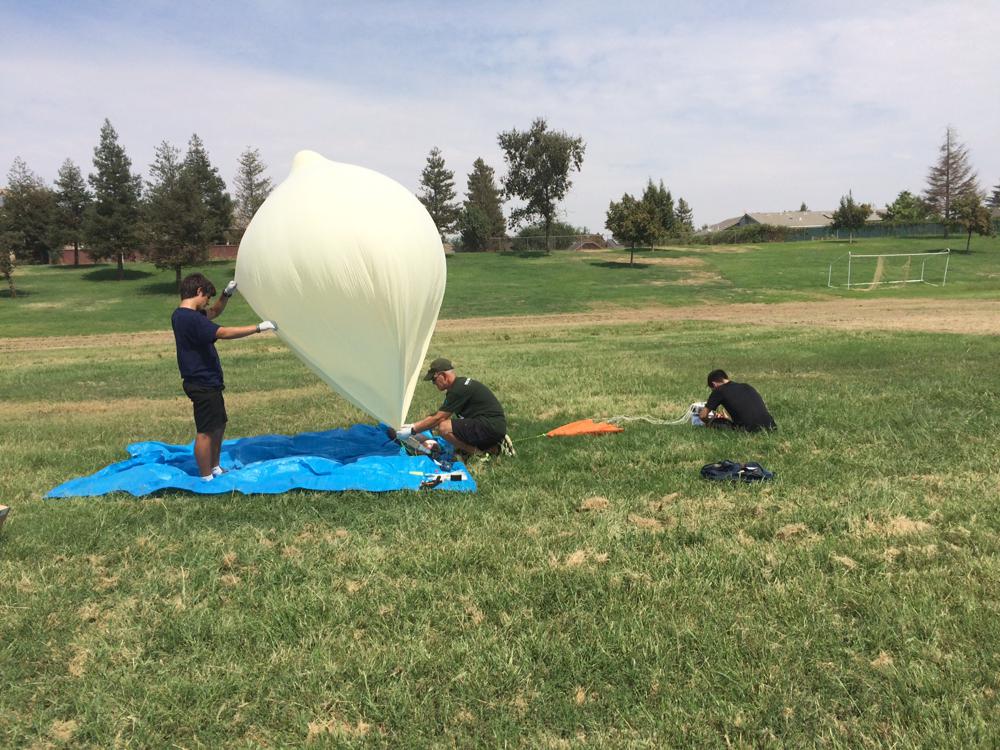
Filling up the balloon and sealing up the payload container
Finally, after double-checking all knots and odd ends, we were ready to release the balloon. Filling it up completely used up almost the whole tank of helium that our supplier had provided.

Ready for launch!
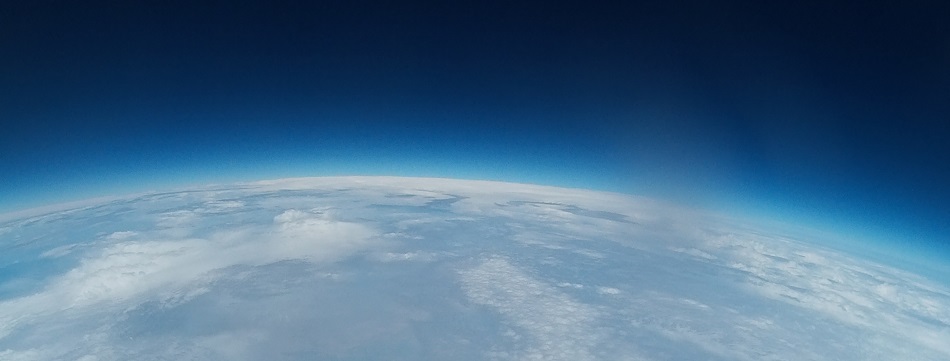
We then set off in our two chase cars to attempt to retrieve a live feed from the balloon. Although this didn't quite as planned (the live feed cut out quite frequently as winds caused the transmitting directional antenna on the balloon to sway), we did end up recovering some nice pictures from the camera SD cards after recovery.
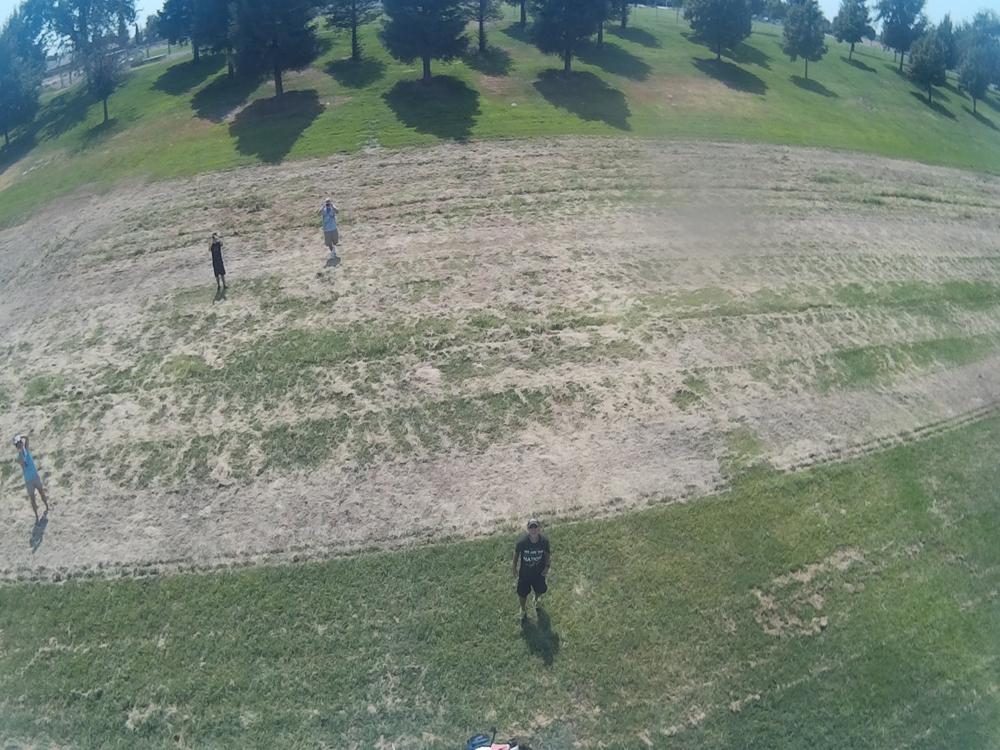
30ft altitude, right after launch

100ft altitude
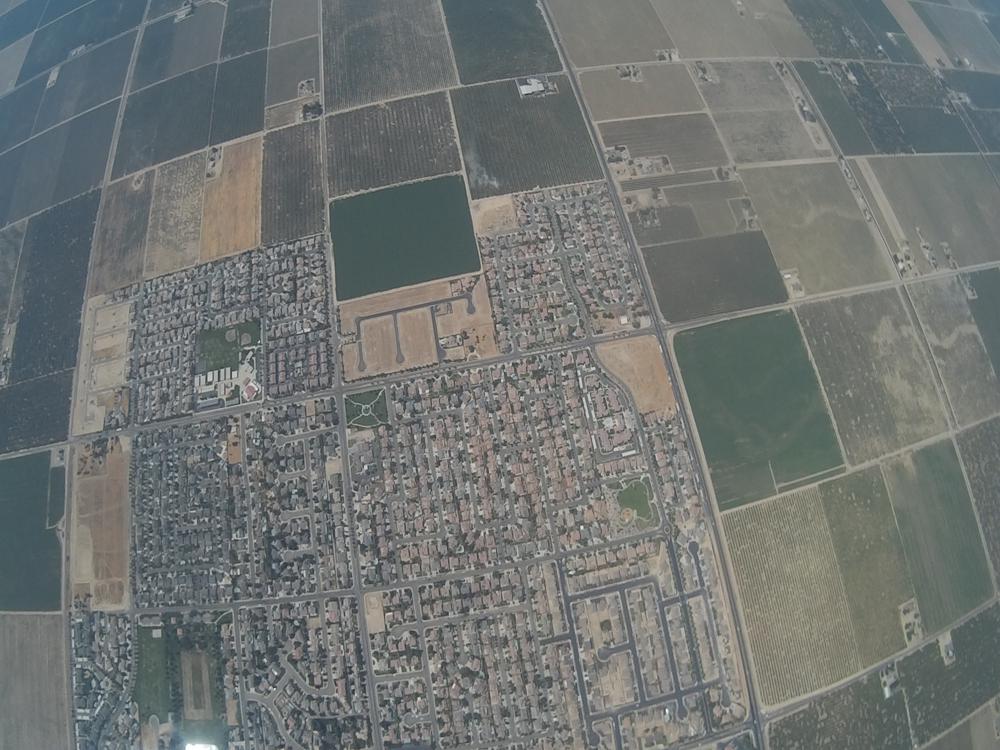
2500ft altitude
10000ft altitude
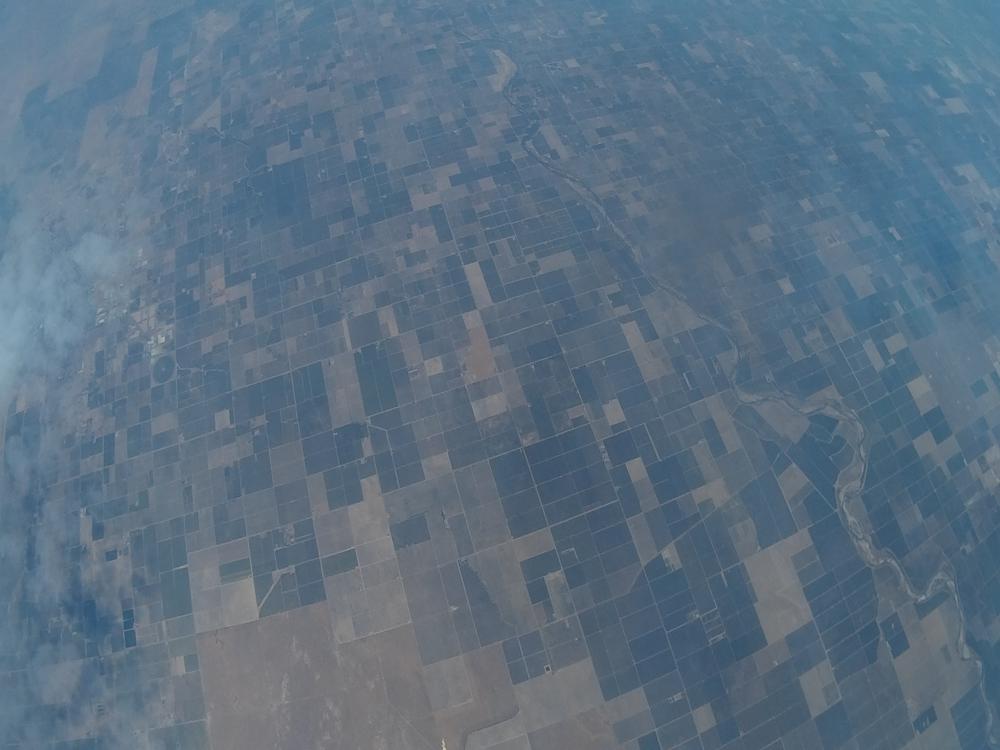
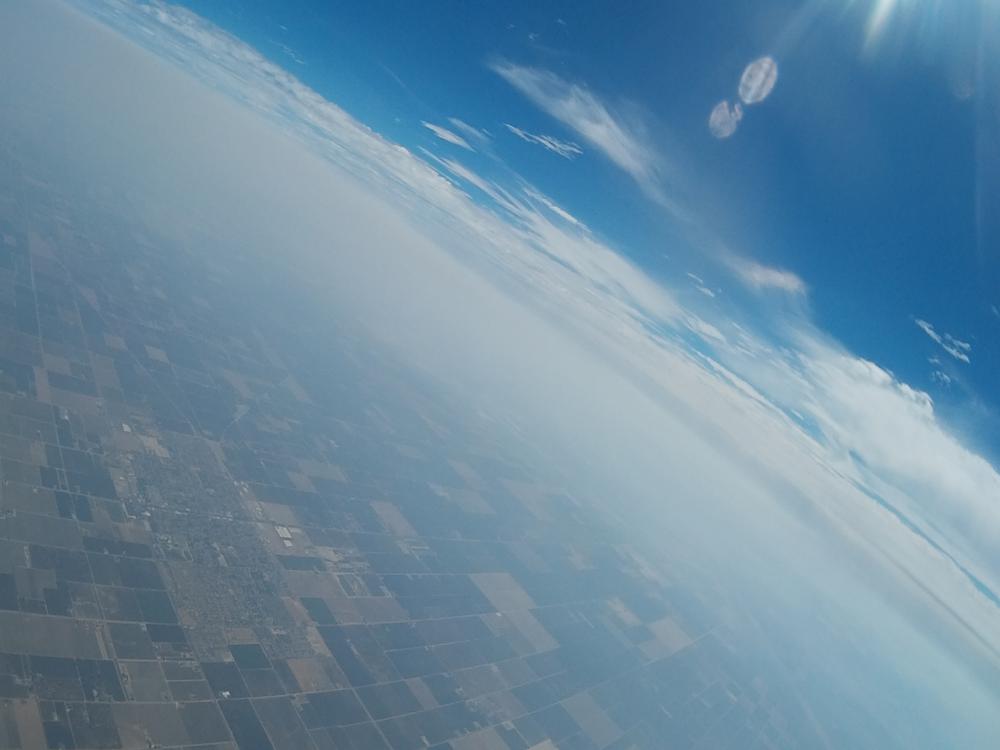
35000ft altitude

70000ft altitude
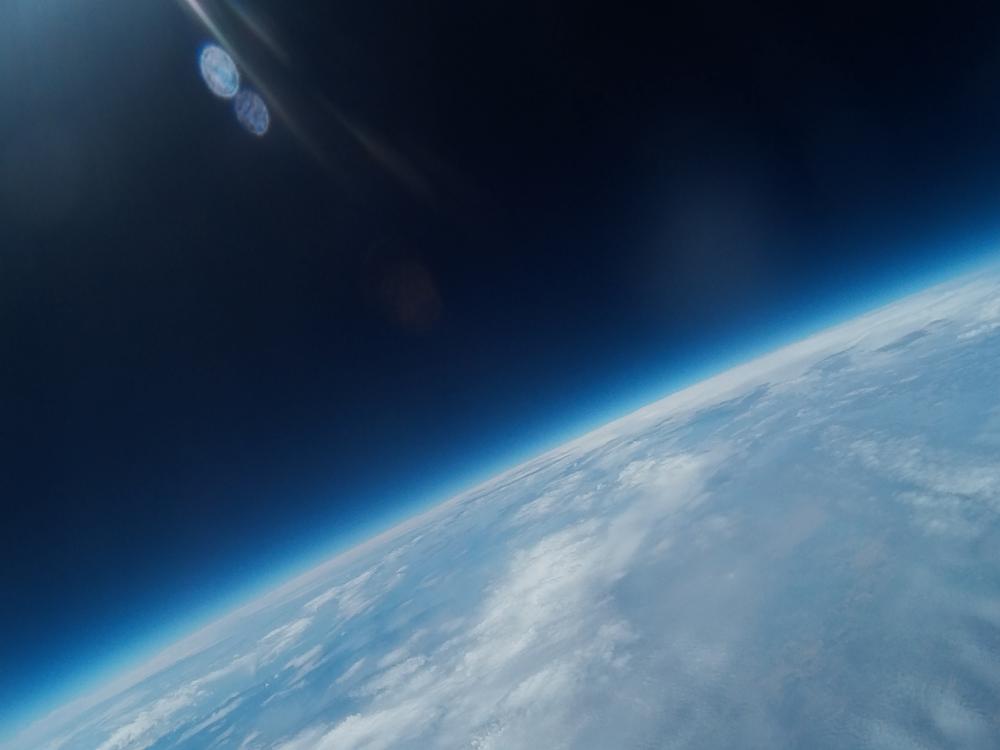
79767ft altitude, where the balloon pops soon after
Due to the poor video connection, we were unable to read the location telemetry data from the video live feed. Instead, the SPOT tracker provided a location of the payload after it safely landed, about 32 miles from our original launch location.

Recovered payload
Recovered Data
Telemetry Sensor Results
- Launch at 0:00:00
- Pop at 1:09:09
- Land at 1:48:15
- Launch → Land Distance 52km (32 miles)
- Launch → Pop Distance 34km (21 miles)
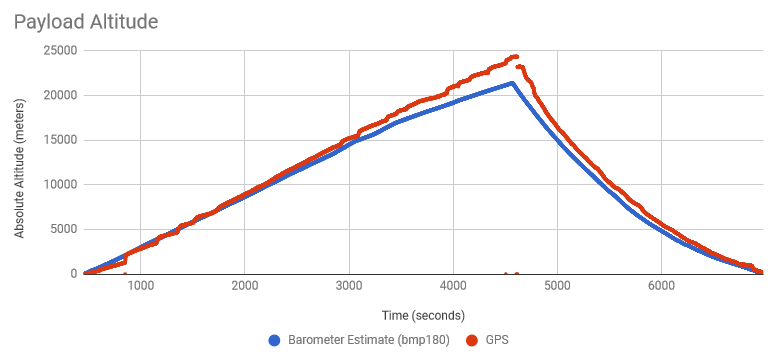
Both the GPS altitude and barometer altitude estimate are shown above. The barometer measurement begins to deviate above 6km due to a combination of thinner air, low temperatures, and possible mis-calibration of the system for estimating high altitudes. Additionally, the GPS appears to drop out at the peak due to a loss of satellite signal during the period of increased vibrations following the balloon pop.
Ascent velocity is constant as the balloon provides roughly static lift to the system. However, descent velocity decreases over time since air density increases at lower altitudes and the parachute provides more of an upward force to counteract gravity.
- Ascent Rate 11mph
- Peak Altitude 24,313 meters (about 15.1 miles)
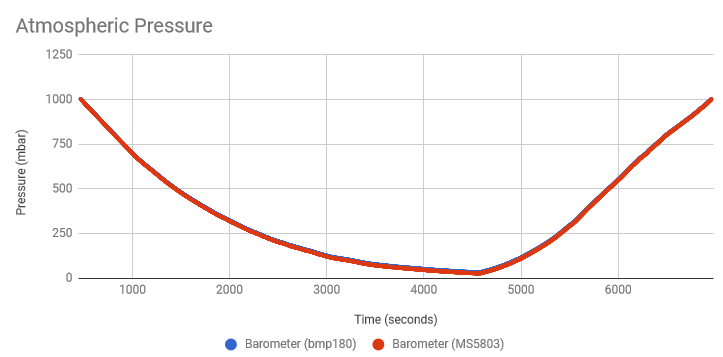
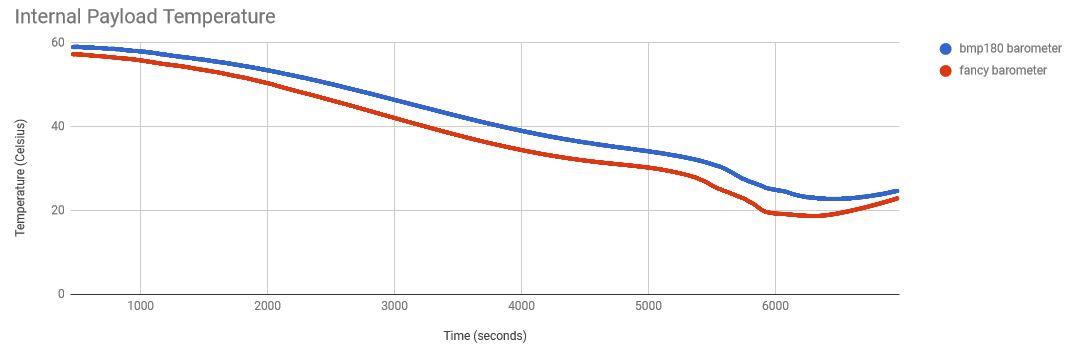
Two barometers were used since we were unsure whether the bmp180 would perform well at higher altitudes, or whether the MS5803 offered accurate estimates at low altitudes. However, both sensors ended up working fine and provided similar results.
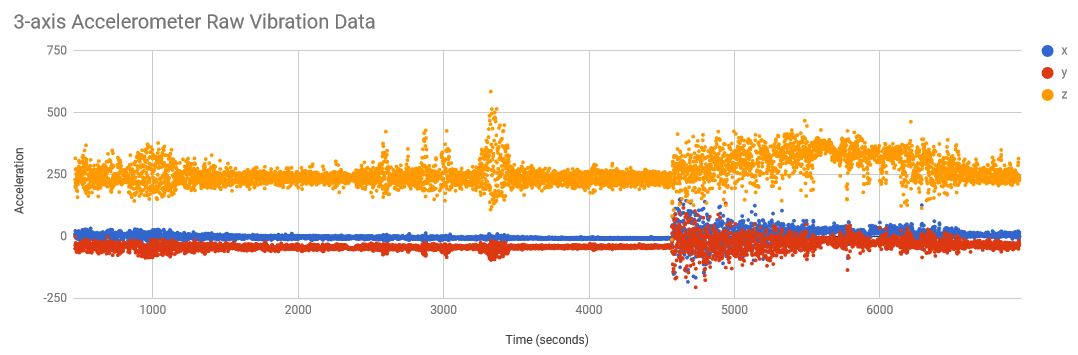
Accelerometer is as-expected: The balloon starts off with a lot of vibrations as the payload ascends through turbulant winds close to the ground. As the balloon climbs, the vibrations increase and decrease depending on the winds that the balloon travels through. Above 60000 feet, low atmospheric pressure results in low vibrations due to wind, and vibrations only return after the payload enters free-fall after the balloon pops.
Internal temperature of the payload starts off quite high due to heat from electronics (mainly the Raspberry Pi + battery), and decreases as heat radiates out of the payload into the colder air at higher altitudes. The temperature then later increases after the balloon reaches lower altitudes with a higher external temperature.
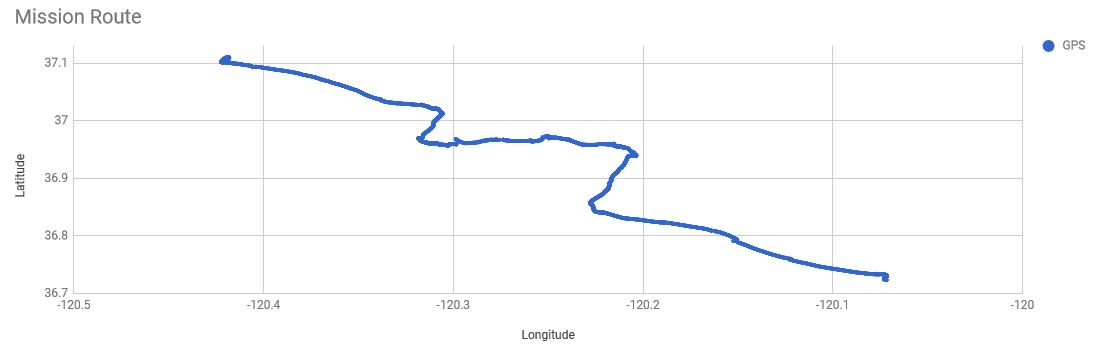
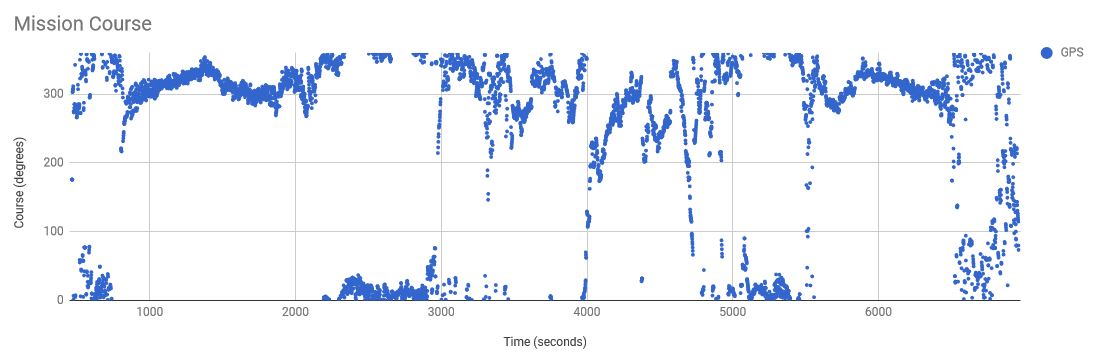
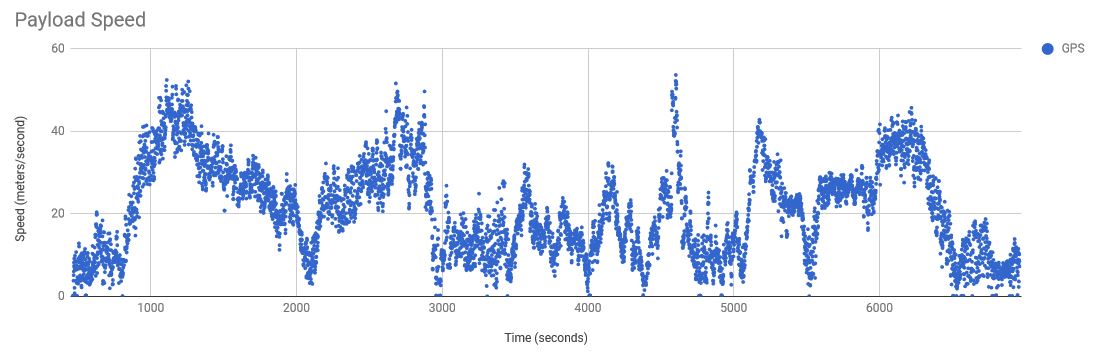
Finally, here are some raw plots from the GPS for the path, course, and speed of the balloon throughout the flight. The flight path is largely dictated by horizontal wind strengths/directions at different atmospheric altitudes.
Captured Video and Timelapse
Full Video
- Takeoff @ 0:00:12
- Pop @ 1:08:28
- Land @ 1:48:20
Timelapse
Photos were taken at 3 second intervals, and stitched together into a video.
- Takeoff @ 00:33
- Pop @ 07:31
- Land @ 11:35
Lessons learned
The launch was generally a success, but there were a few factors that led to an extended delay of the project and issues at launch day:
- Weather dictated our available launch windows, and these windows had to coincide with dates that aligned with our college schedules
- The directional antenna system worked only during limited sections of the flight, namely at the beginning (when the balloon was relatively close to the ground after takeoff) and near the maximum altitude (when winds were calm and the payload was able to aim directly down). However, for most of the ascent, we were not able to receive the live video feed from either chase car since winds caused the payload to oscillate, as seen in the video.
- GPS sensor readings cut out near the burst altitude, as seen from the sensor plots. This was expected due to constraints on civilian GPS systems, and our barometer readings should provide enough information to deduce the missing altitudes through sensor fusion.
We also had several successes during this project:
- The balloon was recovered! Thanks to the SPOT GPS tracker, our team was able to recover the balloon and payload after losing connection with the live video feed at land.
- Kickstarter promises were fulfilled. Due to the long timeframe for the project, there was quite a bit of time between our fundraising efforts on Kickstarter and the launch of the balloon. Many of the Kickstarter reward levels involved some type of deliverable from the retrieved balloon, so the fact that we were able to recover it allowed us to fulfill (or, at least, attempt to fulfill) these gifts.
- Telemetry and video collection systems on the balloon all ran flawlessly, and we were able to successfully recover all data after retrieval of the payload.
A certain amount of luck was also a factor in our successful recovery of the balloon. Weather prediction tools and redundancy in our payload's telemetry and video capture system were critical in minimizing any risk of losing the balloon or failing to retrieve sensor data from the flight. Overall, this was a great opportunity to learn about aerospace and embedded systems, and I'd highly recommend it to anyone who's interested in a DIY project to explore these fields. Feel free to reach out if you have any questions/comments about our launch experience!